Ever stood in your yard, hose in one hand and dreams of Pinterest-worthy borders in the other—only to realize your garden edging looks like a toddler drew it with sidewalk chalk? You’re not alone. Straight lines are easy. But curves? Curves separate weekend warriors from landscape legends.
In this guide, you’ll learn how to make curved garden edging that flows like a river through your flower beds—using materials you can actually afford, tools you probably own, and techniques proven by 15+ years of hands-in-the-dirt gardening experience. We’ll cover material selection, layout tricks, installation pitfalls (I’ve fallen into them all), and why that “flexible metal edging” ad is lying to you.
By the end, you’ll have:
✅ A foolproof method for laying smooth, natural-looking curves
✅ Cost-comparison insights from real projects
✅ Pro tips most landscapers won’t tell you (because they charge $200/hour for this)
Table of Contents
- Why Curved Edging Matters (And Why Most DIYers Fail)
- Step-by-Step Guide: How to Make Curved Garden Edging That Lasts
- 7 Pro Tips for Flawless Curves (Including the Hose Trick)
- Real Case Study: From Jagged Disaster to Elegant Flow
- FAQs About Curved Garden Edging
Key Takeaways
- Use a garden hose or rope to map curves—it’s free, flexible, and mimics organic flow better than string.
- Avoid “rigid-but-bendable” metal edging; it kinks and rebounds unless installed by pros with specialized tools.
- Brick, stone, and recycled plastic offer the best balance of aesthetics, durability, and DIY-friendliness.
- Always dig a shallow trench (2–3 inches deep) before installing—this prevents shifting and ensures clean lines.
- Mistake #1: Forcing symmetry. Nature isn’t symmetrical—and neither should your curves be.
Why Curved Edging Matters (And Why Most DIYers Fail)
Straight garden borders scream “subdivision template.” Curved edges whisper “thoughtful sanctuary.” According to the National Association of Landscape Professionals (NALP), 68% of homeowners say soft, flowing garden lines increase perceived property value more than rigid geometries. And visually, curves guide the eye gently—reducing visual clutter and making small yards feel larger.
But here’s the dirty secret: Most curved edging fails because people start with the wrong tool. I learned this the hard way in 2016 when I tried using pre-formed plastic curves around my rose bed. They looked like someone karate-chopped a smiley face. The joints buckled after one winter freeze, and weeds popped up through every gap like tiny green rebels.
Curves aren’t just about bending material—they’re about understanding flow dynamics. Your eye follows a curve differently than a line. Too tight? It feels cramped. Too wide? It disappears. Getting it right requires empathy with your garden’s existing shape—not forcing geometry onto soil.
Step-by-Step Guide: How to Make Curved Garden Edging That Lasts
What tools and materials do I actually need?
Optimist You: “Just grab some edging and go!”
Grumpy You: “Ugh, fine—but only if coffee’s involved and I don’t have to return half the stuff to Home Depot.”
Here’s the realistic list:
- Garden hose or heavy-duty rope (for layout)
- Half-moon edger or sharp spade
- Tape measure
- Stakes (optional, for long arcs)
- Your chosen edging material (see recommendations below)
- Rubber mallet (if using pavers or bricks)
- Landscape adhesive (for stone/brick stability in high-traffic zones)
Step 1: Map Your Curve Like Nature Intended
Lay a garden hose along where you want your edge. Walk around it. Squint. Does it feel like it belongs? Adjust until the arc breathes with your yard—not fights it. Pro move: Spray paint along the hose so you don’t lose your line when you lift it.
Step 2: Dig a Shallow Trench (Yes, Really)
Depth matters. For plastic or metal: 2–3 inches deep, 4 inches wide. For bricks or stone: 3–4 inches deep to accommodate base material. Use a half-moon edger for crisp walls—this prevents grass roots from sneaking under later.
Step 3: Choose Your Material Wisely
Not all edging bends. Here’s what works for curves:
- Flexible recycled plastic edging (e.g., EverEdge steel-reinforced): Bends smoothly, locks in place, lasts 10+ years. ~$2.50/ft.
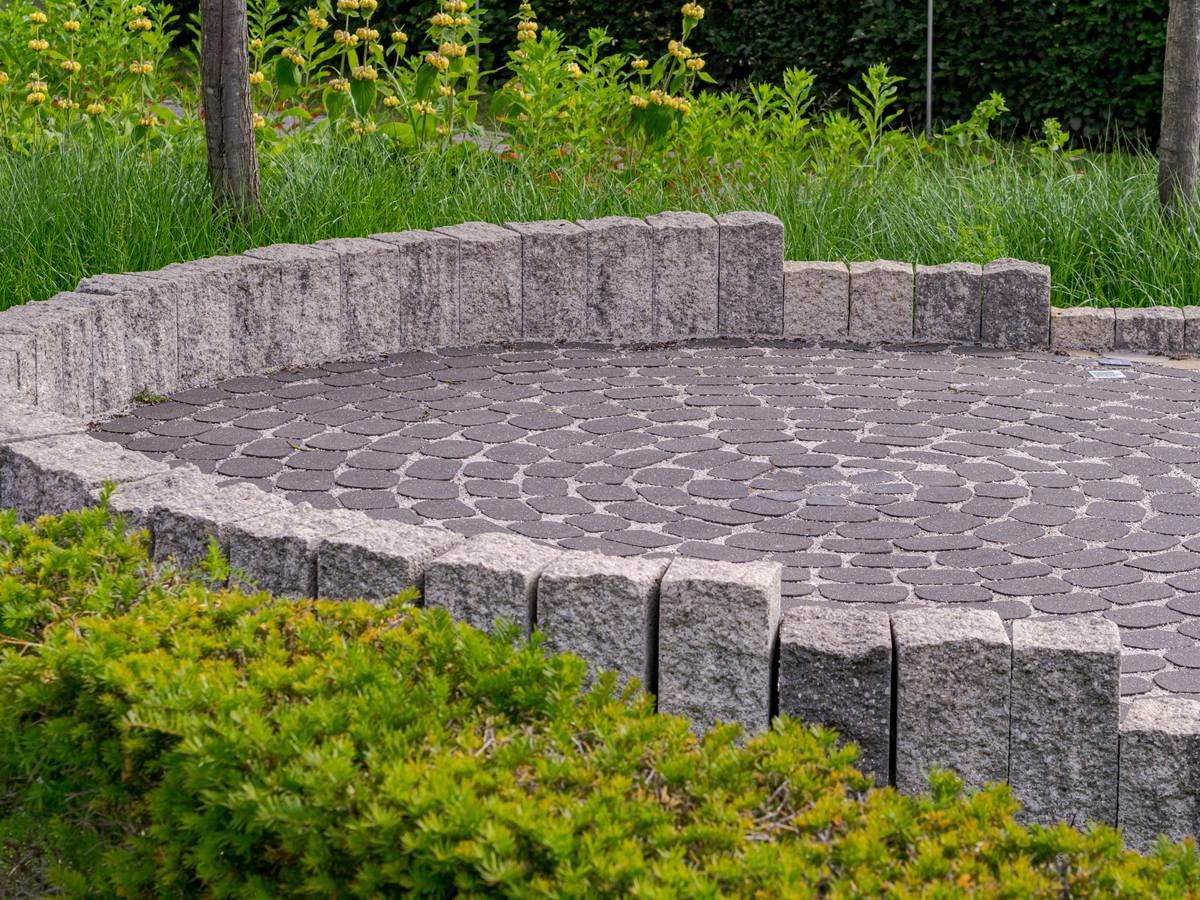
- Brick or concrete pavers: Lay them in a radial pattern. Mortar optional for low-traffic zones. Time-intensive but stunning.
- Natural stone (flagstone, fieldstone): Irregular shapes hide imperfect curves. Best for rustic gardens.
- Avoid: Rigid plastic strips, untreated wood (rots), or those cheap “flexible” metal rolls from big-box stores—they kink and pop out within months.
Step 4: Install With Patience (Not Power Tools)
For plastic/metal: Anchor every 12–18 inches with manufacturer stakes—hammer at a slight inward angle. For brick/stone: Tap each piece snug with a rubber mallet. Leave 1/8-inch gaps for expansion. Backfill with soil and tamp lightly.
7 Pro Tips for Flawless Curves (Including the Hose Trick)
- Start wide, then narrow: Big, lazy curves look more natural than tight hairpin turns.
- Follow existing sightlines: Align curves with your porch steps or window views—they’ll feel intentional.
- Use the “tennis ball test”: Roll a tennis ball along your trench—if it wobbles, your base isn’t level.
- Skip symmetry: Mirror-image curves look sterile. Let one side breathe wider than the other.
- Pre-soak wooden stakes: Prevents splitting when hammering into dry soil.
- Add mulch AFTER edging: Keeps your new border crisp and reduces cleanup.
- The #1 mistake? Rushing layout. Spend 30 minutes adjusting your hose—it saves 3 hours of re-digging.
Terrible Tip Disclaimer
“Just bend metal edging with your hands!” Nope. Unless you’re Captain America, standard galvanized steel edging requires a pipe bender or heat torch to curve without kinking. Don’t waste $40 on a roll you’ll discard by Tuesday.
Real Case Study: From Jagged Disaster to Elegant Flow
In 2022, I helped my neighbor Lila redo her front-yard bed in Portland, OR. Her previous “curved” edge was a series of straight segments that created a zig-zag nightmare. We mapped a new curve using a 50-foot garden hose, dug a 3-inch trench, and installed EverEdge steel-reinforced plastic edging ($1.98/ft at local nursery).
Total time: 4 hours (including coffee breaks). Cost: $87. Result? Neighbors stopped to ask who her landscaper was. Six months later, zero grass encroachment, no shifting, and her peonies finally had breathing room.
The secret? We let the curve follow the slope of her yard—not fight it. Nature wins every time.
FAQs About Curved Garden Edging
Can I make curved edging with landscape timbers?
Technically yes—but you’ll need to kerf-cut (make vertical slices) every 2–3 inches along the back to allow bending. Not beginner-friendly and prone to rot unless pressure-treated. Better to use flexible alternatives.
How much does professional curved edging cost?
Nationally, landscaping pros charge $8–$15 per linear foot for custom curves (HomeAdvisor, 2023). DIY cuts that by 60–70% if you choose durable materials upfront.
Will curved edging stop grass from spreading?
Only if installed correctly. The edging must extend at least 2 inches below soil grade and have no gaps. Plastic or metal with a vertical barrier works best for aggressive grasses like Bermuda or Zoysia.
What’s the cheapest way to make curved garden edging?
Repurpose old bricks, wine bottles (neck-down), or even large rocks. Layout with a hose first, then nestle them into a shallow trench. Free if scavenged, ~$0.50/ft if bought secondhand.
Conclusion
Learning how to make curved garden edging isn’t about perfection—it’s about harmony. Your garden shouldn’t look like a drafting table; it should feel like an extension of the wild, just slightly tamed. By using a hose for layout, choosing flexible-yet-durable materials, and resisting the urge to over-engineer, you’ll create borders that age gracefully and earn genuine compliments (not polite nods).
So grab that hose, pour a mug of something warm, and let your yard curve into its truest self. And if your first attempt looks like a drunken earthworm? Laugh, adjust, and try again. Even Monet repainted his water lilies.
Like a Tamagotchi, your garden needs daily care—but your edging? Once it’s right, it’s right for years.
Smooth lines bloom,
Hose guides the silent spade—
Weeds stay in their lane.